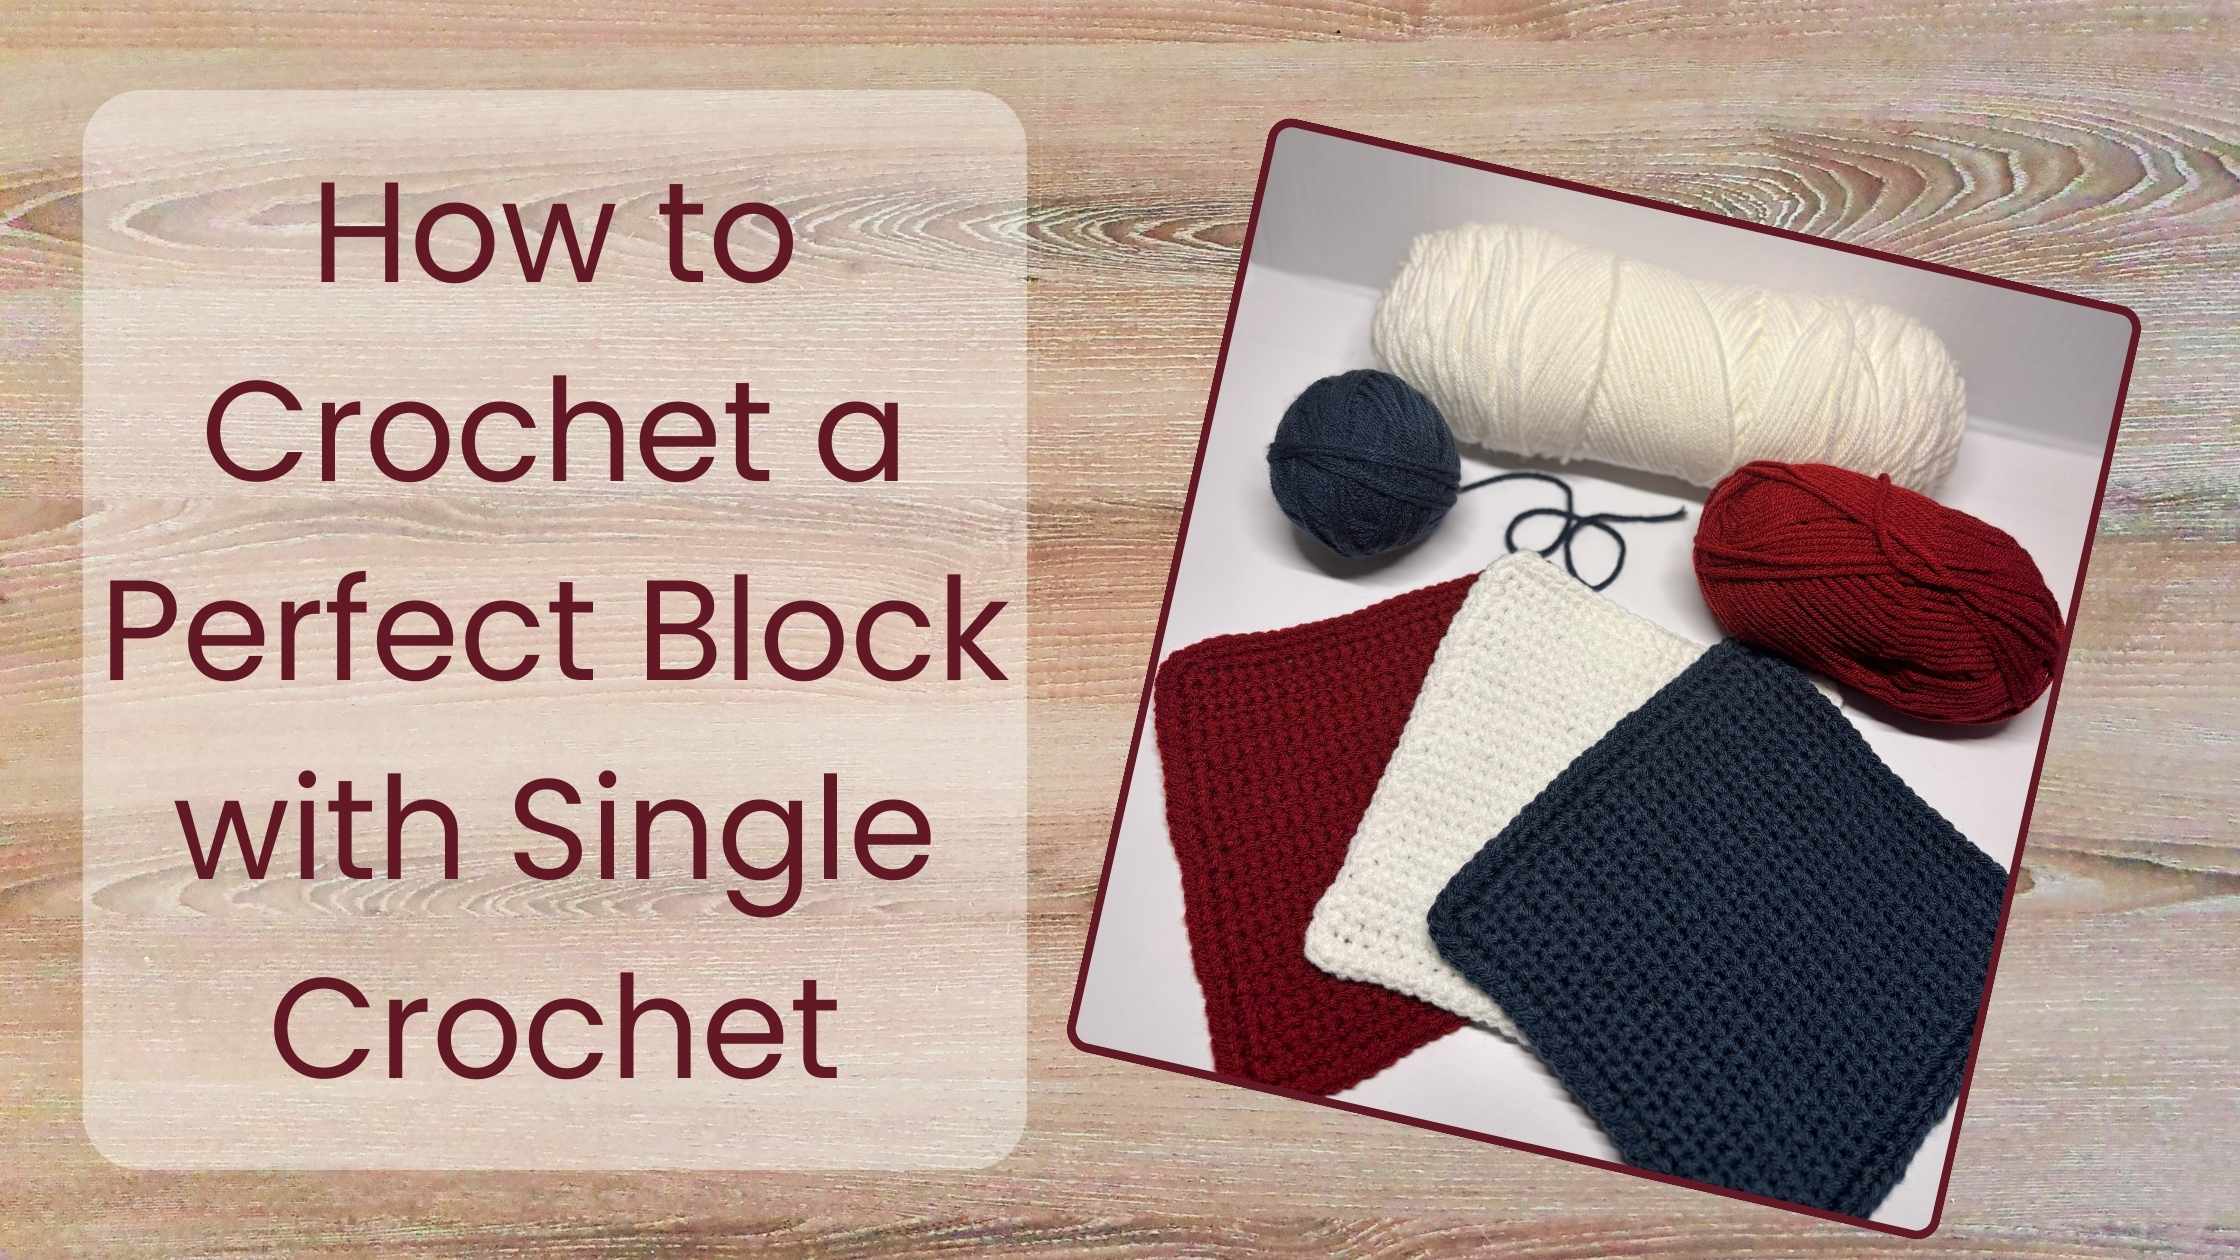
Crocheting a block with the single crochet stitch is a fantastic beginner-friendly project that helps build confidence and consistency. Whether you’re creating a cozy blanket or testing out stitches, learning to make a well-formed crochet block is an essential skill. This guide will take you through each step, from starting with a strong foundation chain to adding a polished border and joining your blocks together.
Let’s dive into the process and get you stitching in no time!
Building a Solid Foundation Chain
Every crochet project starts with a strong foundation, and your crochet block is no different! The foundation chain is the first row of stitches and determines the width of your block.
How to Make a Foundation Chain:
- Make a slip knot and place it on your hook.
- Yarn over (wrap the yarn around your hook from back to front).
- Pull through the loop—congratulations, you just made your first chain stitch!
- Repeat this process until you reach 25 chains for approximately a 6” block.
💡 Pro Tip: Keep your tension even! If your chains are too tight, your block may curl. If they’re too loose, your stitches will be uneven. With practice, you’ll find the perfect balance!
The Art of Even Stitches: Crocheting a Neat and Even Square
Now that your foundation chain is ready, it’s time to add rows of single crochet stitches.
How to Work the First Row:
- Insert your hook into the second chain from the hook.
- Yarn over and pull up a loop (you’ll have two loops on your hook).
- Yarn over again and pull through both loops—that’s a single crochet stitch!
- Repeat this across the row until you reach the end. (24SC)
At the end of the row, chain one and turn your work. Keep repeating rows of single crochet until your block reaches 6 inches tall (around 28 rows).
💡 Pro Tip: Count your stitches at the end of each row to avoid accidentally adding or losing stitches. Uneven edges often come from missed stitches!
Making Sure Your Block is the Right Size
As you work, it’s important to measure your block to ensure it’s the correct size. Different tension levels may slightly affect your stitch count, so always check your progress.
How to Adjust Your Block Size:
- If your block is too small, add extra rows until it reaches 7 inches.
- If your block is too large, remove a few rows.
- If it’s too tight or too loose, try adjusting your tension or switching to a different hook size.
Once your block is 6 inches by 6 inches, it’s time to add a finishing border!

Finishing the Block with an Edging Round
Adding a border gives your crochet block a clean, professional look and makes it easier to sew blocks together if you’re making a blanket.
How to Single Crochet Around the Block:
- Chain one after finishing your last row.
- Turn your work and single crochet down the side of the block (about 26 stitches per side).
- In each corner, work three single crochet stitches to keep the edges even.
- Continue crocheting around until you reach the start.
- If your block isn’t quite 7 inches, add another round of single crochet.
💡 Pro Tip: Use a stitch marker to mark each corner so you don’t lose track of where to place extra stitches!

Sewing Blocks Together Like a Pro
Once you’ve made a few blocks, you can start joining them together to create a larger project, like a blanket!
How to Sew Two Blocks Together:
- Lay two blocks with the front sides facing each other.
- Thread a yarn needle with a length of yarn about twice as long as one block.
- Insert the needle into the back loops of the first stitches on both blocks.
- Pull the yarn through, leaving a 4-inch tail.
- Continue stitching through the back loops only along the entire edge.
For a more in depth look at sewing the blocks together, read: Easy Way To Join Crochet Blocks
Adding a Beautiful Border to Your Blanket
To give your finished project a polished look, consider adding a single crochet border around the entire blanket.
How to Add a Simple Single Crochet Border:
- Start at any corner and attach your yarn.
- Work one single crochet in each stitch along the edge.
- When you reach a corner, make three single crochet stitches in the same spot.
- Continue crocheting around the entire blanket.
- Slip stitch to join, then fasten off.
This border not only makes your blanket look neat, but it also helps even out any slightly uneven edges!

Use the Single Crochet block to make a blanket like the one pictured above. Learn how: Step-by-Step: Making A Crochet Blanket With Blocks
Final Thoughts: Enjoy the Process!
Crocheting a block with the single crochet stitch is a great way to practice tension, stitch consistency, and measuring techniques. Whether you’re making a blanket, potholder, or practice swatch, this skill is the foundation of many beautiful crochet projects.
The key to success? Take your time, count your stitches, and don’t stress over small mistakes. Every block you crochet improves your skills and gets you closer to a finished masterpiece.
✨ Happy Crocheting! ✨
There’s so much more to come! I’ll be adding even more stunning blocks, so stay tuned and don’t forget to subscribe—you won’t want to miss out! Mix and match them all to create a gorgeous, one-of-a-kind blanket while mastering new stitches along the way. Let’s get stitching!
Join my Facebook Group: ShareYourCrochet